
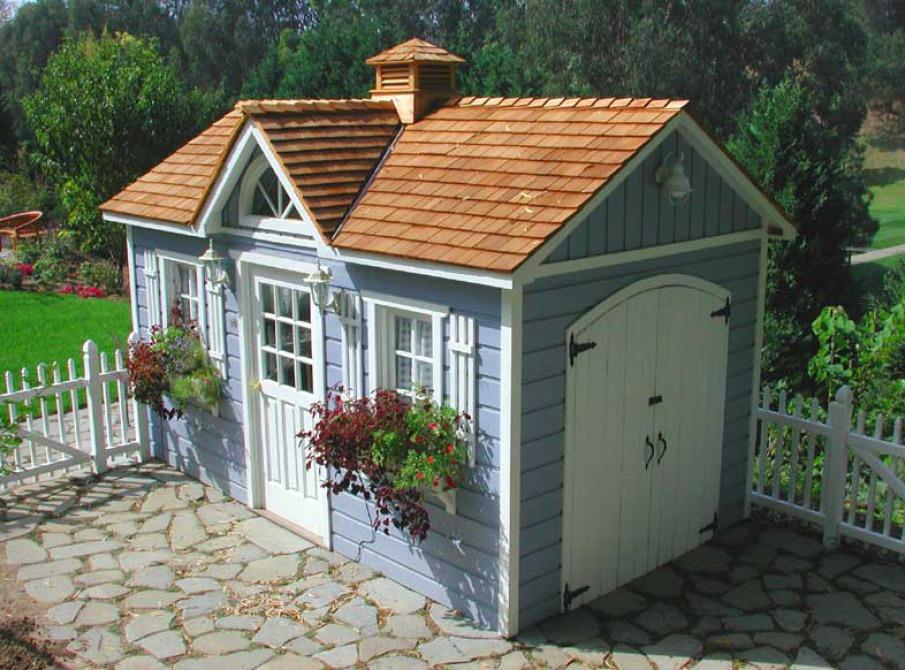
Cedar is by far our favourite siding material for countless reasons. Although we understand the need and convenience of maintenance free options, when it comes to siding, we simply can’t compete with nature. Western Red Cedar has been our first choice for years due to its durability, ascetic appeal, and environmental sustainability.
At Summerwood, we always recommend that our customers stain their cedar-sided building. So, why do we recommend this to our customers? Although you can let your cedar weather naturally when used for a deck or a fence, when you’re using it as a siding the idea is to keep the elements out. You want your beautiful custom backyard building to stay that way, and for your belongings to remain safe and dry inside. Staining the cedar is the absolute best way to ensure this, especially in areas that have four-season climates. Since Western Red Cedar naturally lacks pitch and resin, it allows for countless staining options and will accept stain very well if applied correctly. To help you properly stain your newly built outdoor structure, we’ve come up with 10 tips to help you stain your cedar and to keep it looking new for years to come.
10 Tips for staining your cedar
1. Three choices for staining
When it comes to staining your cedar, you have three choices: natural, semi -transparent, and coloured or opaque. Consider whether you want your building to look untouched or add a pop of colour to your yard before choosing.
2. Transparent stains have water-repellent features
Cedar is known to age gracefully to a soft, silver-grey patina, but it’s wise to keep the rich tones of your cedar siding lasting longer. Transparent stains contain no pigment but have water-repellent features that will help to retain natural tones and slow down the natural colour change process. It’s a win-win!
3. Offer up a hint of colour
Semi-transparent stains offer up a hint of colour. They still represent the wood beautifully but give it a little boost. Grains and knots in your wood will be modified, not enough to take away from its natural qualities though!
4. Coloured/Opaque finishes add a little charm
Coloured/opaque finishes allow you to have fun with your finished product. If you want to go for a dramatic look, or maybe add a little extra charm, this may be the way to go. This option isn’t for the indecisive though, so make sure you know exactly what you want!
5. The sooner you treat your cedar, the better
Once you’ve decided on your finish it’s best to get to work quickly. The sooner you treat your cedar, the better. Although cedar is naturally resistant to rot and decay, staining your siding promptly will help in the preventing of deterioration.

6. Wash & wait for it to dry
Prepare your cedar siding by washing it with soapy water to remove any dirt or dust (if any has accumulated). After you have washed it, wait for it to dry before applying any stain to the cedar.
7. Use a thick brush when staining
One of the most thorough methods when staining is to use a thick, natural bristle brush. The brush bristles will distribute the stain evenly onto the wood, as well as helping to reach the undulations on the surface of the cedar. If you are thinking about using a rolling brush.
8. Work in the shade while staining
It is best to apply the stain to the cedar while working the shade. This will allow the stain to sink deeper in the cedar surface. One of the best ways to help them dry properly is to set them on sawhorses, thus keeping them off the grass, soil, and sand, making your task a lot easier.
9. Allow the stain to dry slowly & apply a second coat
Two coats are always recommended when you want to maintain the natural look of Western red cedar. After you have put the first coat on, it is recommended that you wait 6 to 8 hours for it to dry before placing a second coat on.
10. Enjoy!
Bask in the glory of your newly finished cedar building for years to come.
When it comes to staining your cedar, it’s important to consider the long-lasting beauty and functionality of your outdoor space. Choosing the best outdoor kitchen cabinets can be a game-changer, providing ample storage and organization while seamlessly blending with the natural charm of your cedar-stained oasis.
For countless styles and options, cedar is consistently the best choice! Please don’t hesitate to contact the design experts at Summerwood with any questions you may have: 1-866-519-4634.
If you’re ready to design your very own spectacular cedar building, or do some brainstorming, our Design Center will get your creative wheels turning!

Share This Story!


Pretty! This has been a really wonderful article. Many thanks for providing these details.
This blog was… how do you say it? Relevant!! Finally I have found something that helped me. Kudos!